Note: This post is similar in nature from my previous post here, however this post is somewhat more streamlined and hopefully should be easier to follow.
It it assumed that you have the following in place:
- Standalone Root CA server (Win Server 2012 R2 or Win Server 2016)
- An appropriate template for SCOM exists on the CA server
- Access to CA server web enrollment website (auto enrollment enabled)
- Two (at least) servers that do not have a full trust relationship:
- Untrusted agent to gateway
- Untrusted gateway to management server
- Untrusted agent to management server
Root Certificate:
Every mgmt server*, every gateway, every untrusted (or non-domain) agent/machine will require installation of the ROOT CA certificate. This certificate will need to be imported into the Local Computer -> Trusted Root Certification Authorities store by using the MMC with the Certificates snap-in. Instructions below.
(*if the mgmt server IS the root CA, the CA cert will already exist; no need to import it)
Client Certificate:
Every mgmt server, every gateway, every untrusted (or non-domain) agent/machine will require installation of a client certificate issued by the ROOT CA. This certificate will need to be imported into the Local Computer -> Personal store by using MOMCertImport.exe. Instructions are below. Another way of viewing the certificate requirements is depicted in the table below.
In essence, if a full trust does not exist between any two servers, both certificate types are needed on both.
| Mgmt Servers | Untrusted Agent Servers | Gateway Servers | <if full trust does not exist between 2 servers> | |
| Root Certificate(*1) | X | X | X | X |
| Client Certificate(*2) | X | X | X | X |
*1 – Must be imported into the Local Computer -> Trusted Root Certification Authorities store
*2 – Must imported into the Local Computer -> Personal store by using MOMCertImport.exe.
Note: Typically you would perform these steps from the server where you wish to install the Root CA certificate. However, sometimes the target server does not have access to the web enrollment website. In this case you can install the Root CA cert on ANY server, then export it, then install it wherever it is needed.


Save the cert. Keep it simple.


Notice that “Local Machine” is automatically selected.


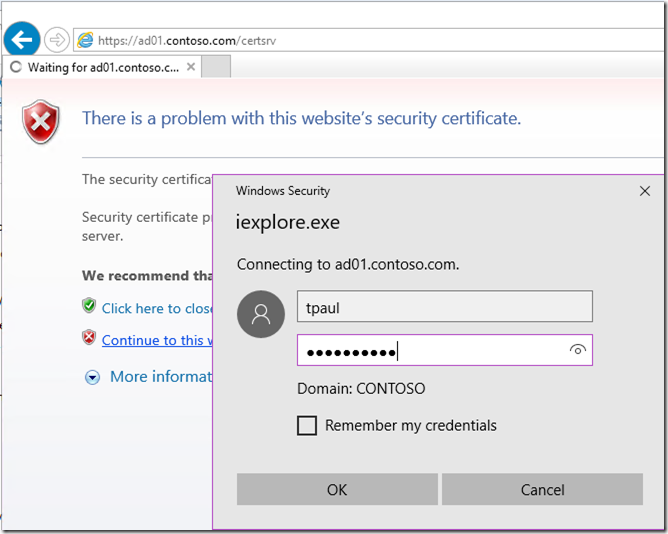
Request CLIENT Certificate from Web Enrollment CA

Note: Often the clients/agents will not have access to the Web Enrollment CA server and therefore cannot use the web enrollment website. This might be due to network/firewall limitations or various other reasons. In this case, you can use a browser on ANY server that is able to contact the CA web enrollment website to complete the certificate request form. Once the certificate is approved and ready to download. You can download/install the client certificate on ANY server, then export that client cert so that it can be copied to the target untrusted agent server for import.
![clip_image001[8] clip_image001[8]](https://monitoringguys.com/wp-content/uploads/2020/06/clip_image0018_thumb.png)
My server doesn’t have the appropriate Template!
![clip_image002[8] clip_image002[8]](https://monitoringguys.com/wp-content/uploads/2020/06/clip_image0028_thumb.png)
Time to add an appropriate certificate template for SCOM.
…after appropriate certificate template has been added to the CA the template is now available in the dropdown list. (you may have to refresh your browser window/session for the template to appear)


![clip_image005[5] clip_image005[5]](https://monitoringguys.com/wp-content/uploads/2020/06/clip_image0055_thumb.png)
Certificate is imported to the default Current User store but this needs to be in the Local Computer store.
Note: Some of these screenshots below were borrowed from my previous blog post (“GW01” to “WIN02”). Ignore the obvious change in example server name. Just recognize that WIN02 is an untrusted client in this client/server scenario.
On GW01, add both Certificate snap-ins as shown.


Export the Cert so that it can be imported into the Local Computer store.


Provide a password :

Save the certificate to an easy location like C:\Temp
![clip_image011[5] clip_image011[5]](https://monitoringguys.com/wp-content/uploads/2020/06/clip_image0115.jpg)
Note: You may notice the change in name being used here. This is an older screenshot so just ignore this. Assume we are still dealing with GW01 as the untrusted client server in this client/server scenario.
![clip_image012[5] clip_image012[5]](https://monitoringguys.com/wp-content/uploads/2020/06/clip_image0125.jpg)

Once the client certificate is exported to a local folder, use MomCertImport.exe to import the client certificate which will end up in the correct location. This also sets the serial number in the registry (it actually appears backwards in the registry). This tool is located in the Support Tools\AMD64 folder on the SCOM installation media.
Locate the MomCertImport.exe tool. Copy it to somewhere simple like C:\Temp , where your client cert should also be located in the same folder. Keep it simple.
Example with Powershell (as Administrator), assuming PowerShell current directory is C:\Temp:
.\MOMCertImport.exe .\MS02-client.pfx
If the .pfx is password protected, you will be prompted. After import, the client cert will appear in the correct certificate store.

Registry example before import:

Registry after Import:
(Notice that the serial appears backwards from how it is displayed in the certificate properties. This is normal.)

Troubleshooting:
ImportPFXCertificate failed: Catastrophic failure
Error code: 8000FFF
If you see this message it probably means that you exported the certificate chain. Don’t include the cert chain. Go back, export it again according to the export wizard screenshot below.

